You might be here because you’ve heard it’s smart to build websites offline before you show them to the world.
That’s exactly right.
Installing WordPress locally on a Windows PC provides a sandbox where you can try themes, test plugins, experiment with layouts and break things without anyone seeing.
Imagine planning a renovation in a model home before doing it for real.
A local WordPress setup gives you that preview space and is safer and faster than working on a live site.
In this post we walk through why this still matters, then move into setting it up.
- What You Can Do With a Local WordPress Site
- How To Download and Install WampServer
- Create a WordPress Database
- Run the WordPress Install
- Common WampServer Problems and How To Fix Them
- What You Can Do Next
- Publishing Your Local Site
- Install WordPress on WampServer – Quick Checklist
- Final Thoughts
- Install WordPress Locally FAQs
What You Can Do With a Local WordPress Site
Before we install anything, are you:
- Testing new plugins before deploying to your live site?
- Trying out themes or features without impacting users?
- Learning WordPress while keeping hosting costs down?
A local install lets you build, break, learn and refine with no risk.
By the end of this guide, you should feel confident doing all those things.
If you want to skip the local install but still test WordPress safely, check out ZipWP.

It’s an AI website builder that creates fully working WordPress websites in less than 60 seconds!
Related articles:
- How to install WordPress on a web host
- How To Install the Astra Theme
- Must-Have Plugins For Every Successful WordPress Website
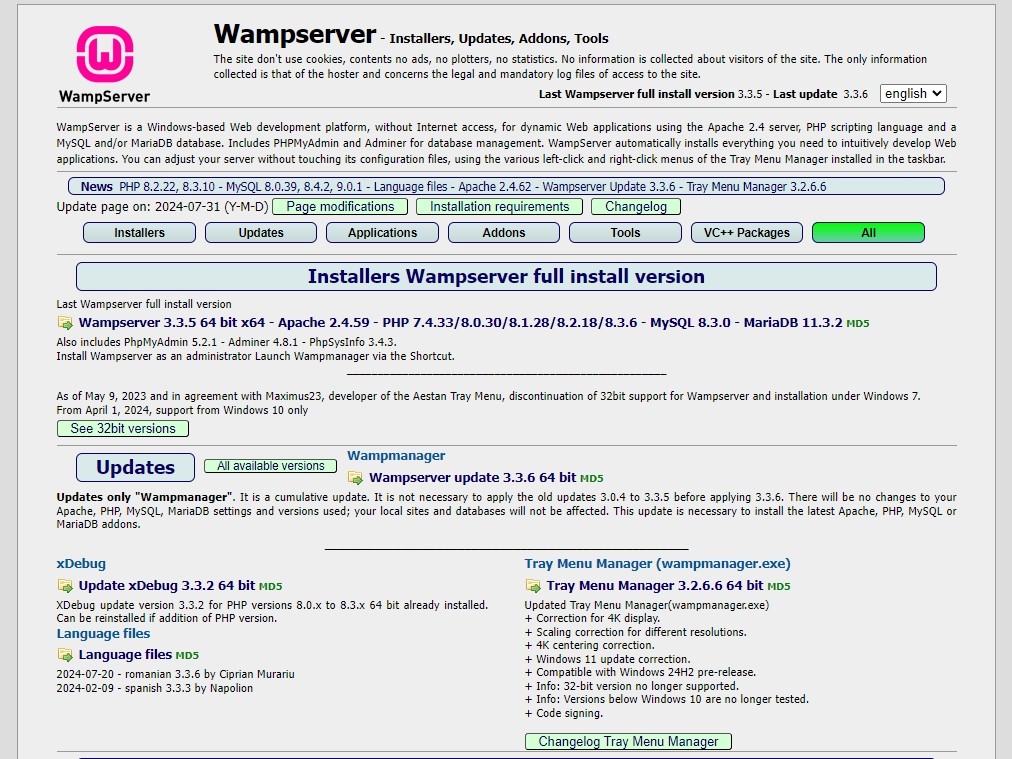
How To Download and Install WampServer
WampServer is the software package that makes your Windows computer mimic a web server.
It includes Apache (web server), MySQL/MariaDB (database), and PHP (the language WordPress runs on).
Step-by-Step Guide to Installing WampServer
Go to the official WampServer website and download the version that matches your PC’s architecture (usually 64-bit).
Open the downloaded EXE file and follow the setup prompts.
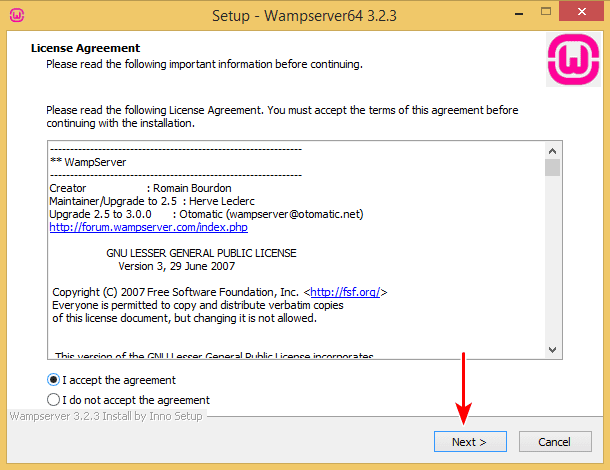
If the install process flags missing Microsoft Visual C++ components, install them as they are required for PHP to run.
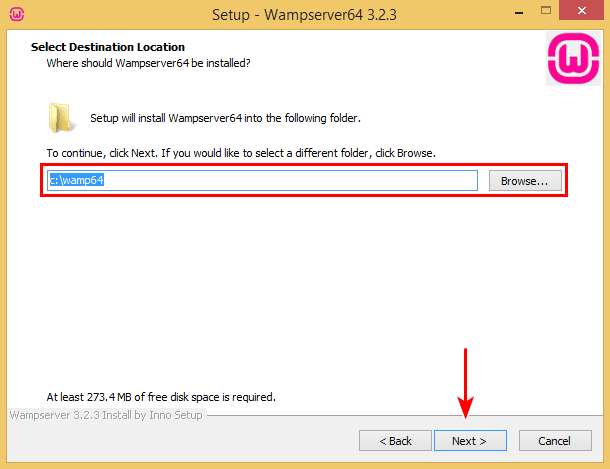
When the installer finishes, launch WampServer.
You’ll know it’s working when you see the WampServer icon in your system tray turn green.
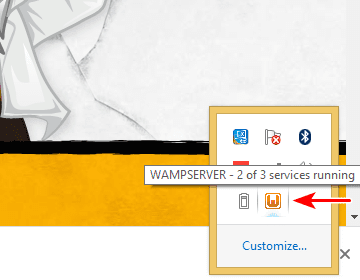
That means all services (Apache, MySQL/MariaDB) are running successfully.
If the icon stays orange, it usually means only some services are running. Try restarting WampServer services from that tray icon.

If it stays red, double-check that you installed all required redistributable packages for your version of Windows.
What Comes Next
Now your server environment is running locally, your machine is behaving like a real web host.
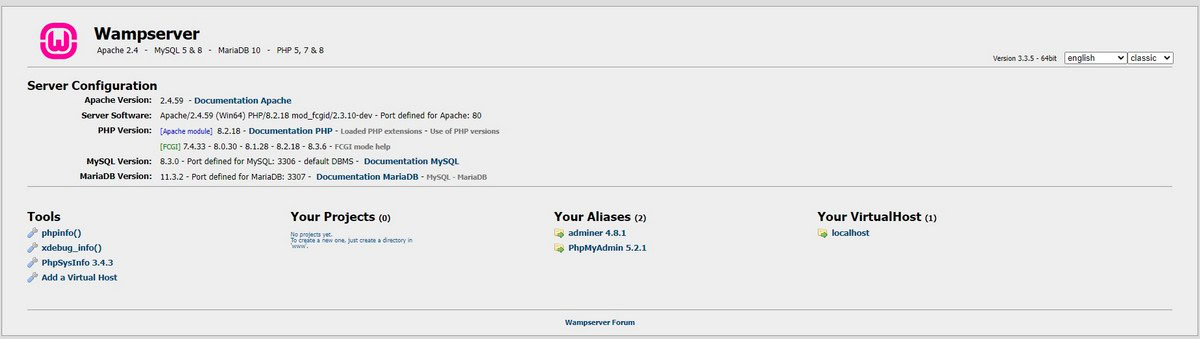
Open your browser and type http://localhost to see the WampServer homepage. If it loads, you’re ready for the next step.
Prefer to watch rather than read?

Download and Prepare WordPress
With WampServer installed, you now need WordPress.
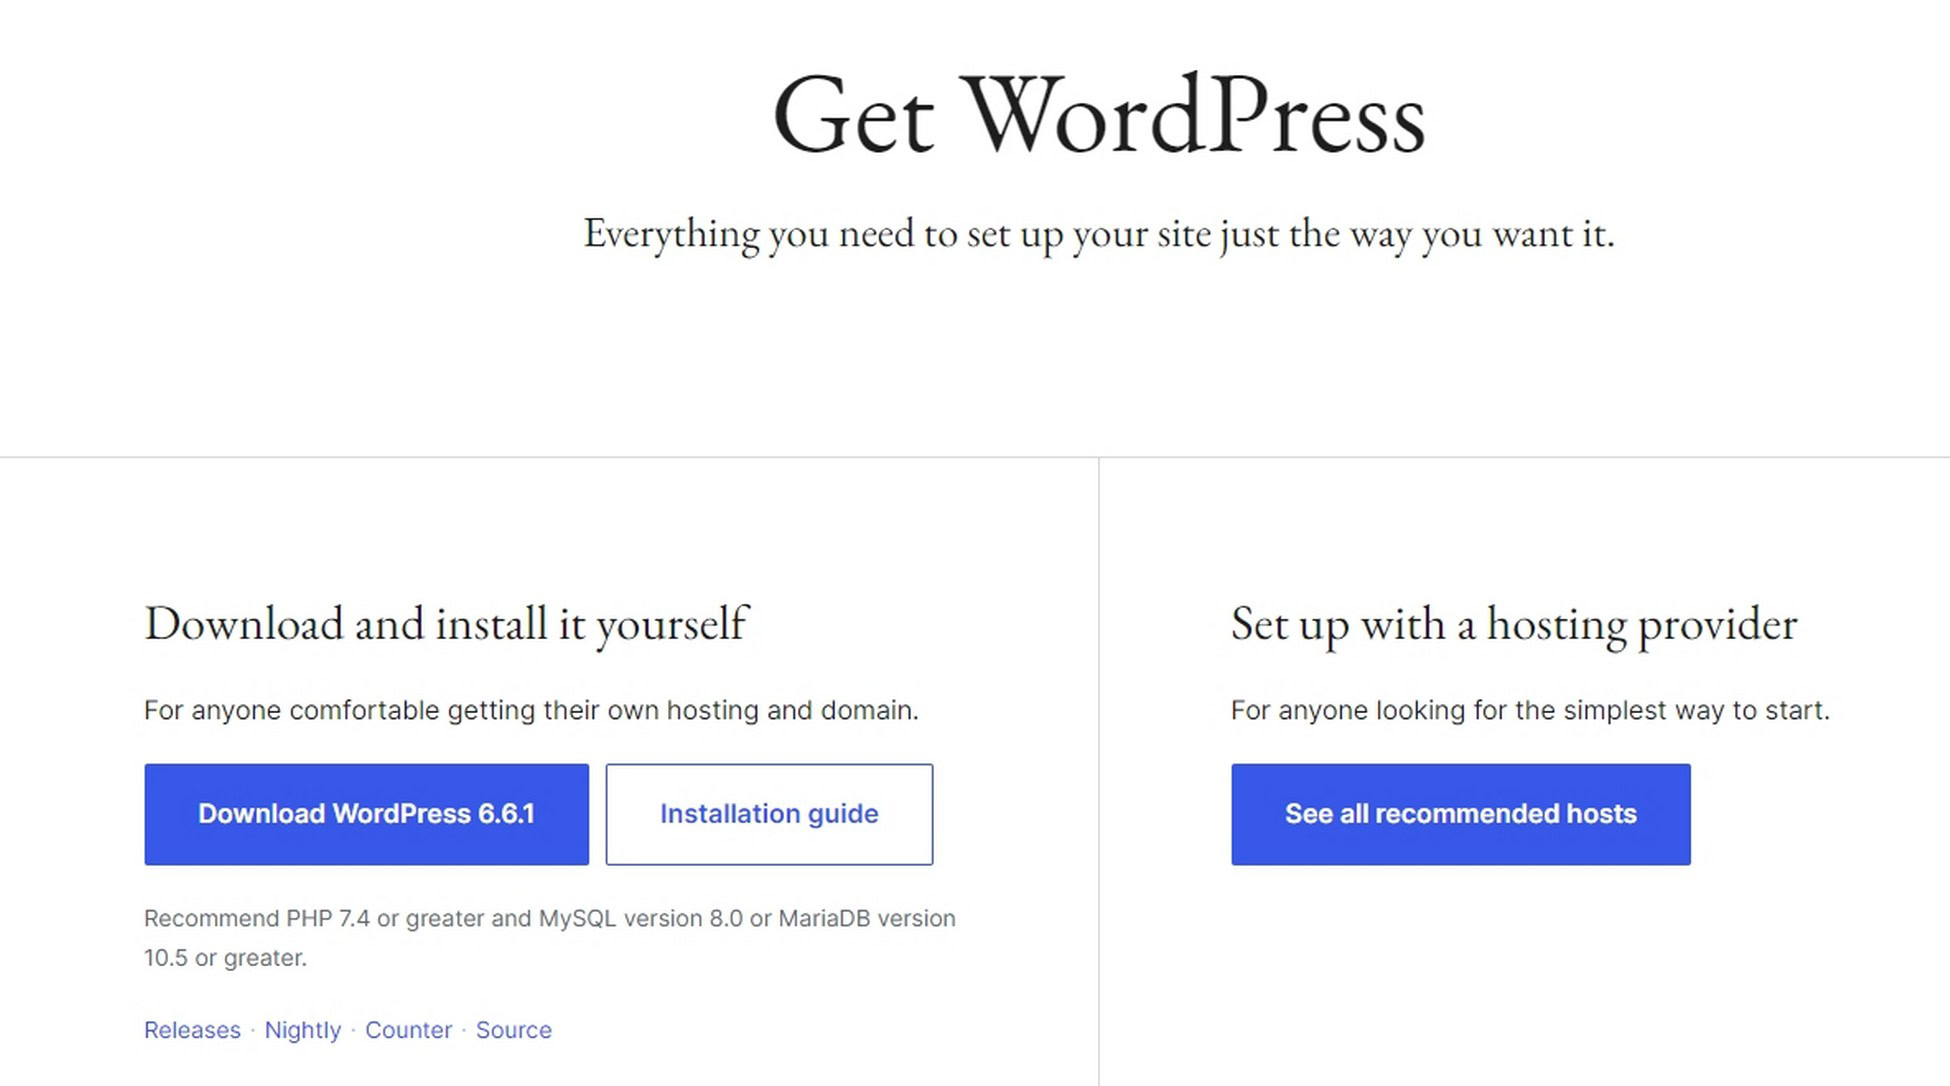
Visit WordPress.org and download the latest release.
Once the ZIP file is downloaded, extract it.
Inside the extracted folder you’ll find a directory simply named wordpress.
Now copy that entire folder to the WampServer root folder.
You’ll find that at: C:\wamp64\www
Rename the WordPress folder to something meaningful for your project, like “myportfolio” or “testsite”.
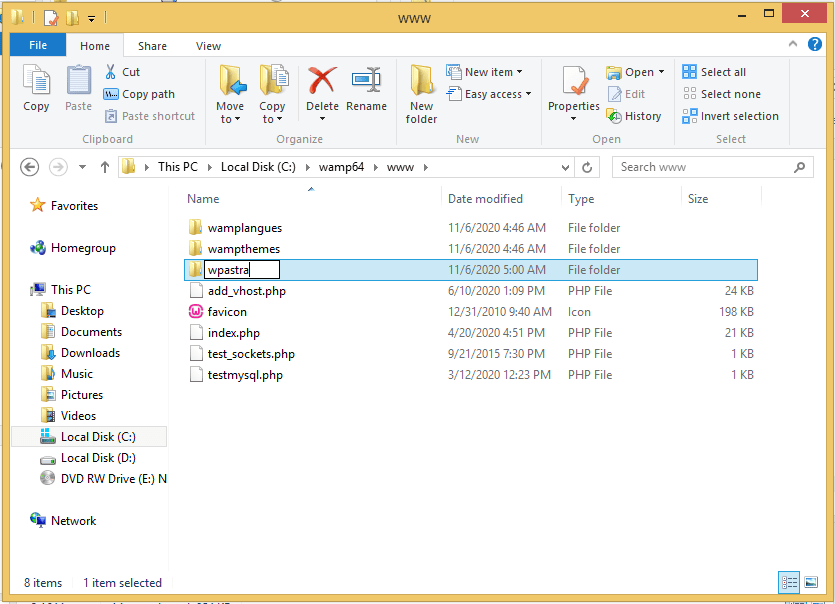
This renaming step helps you keep multiple local projects separate. Later you can use http://localhost/myportfolio to load it in the browser.
Why It Matters
Every local WordPress install exists in its own folder under www.
That means you can build multiple WordPress projects on your machine, each in a separate folder.
Imagine creating a test site for a client, a sandbox for learning and your main project in parallel.
This method of adding a folder for each makes it easy.
Create a WordPress Database
WordPress needs a database to store content, settings, posts, pages, users and everything else.
How To Create and Configure the Database
In your system tray, click the WampServer icon.
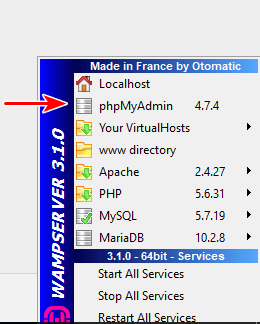
Choose phpMyAdmin or open a browser and go to http://localhost/phpmyadmin
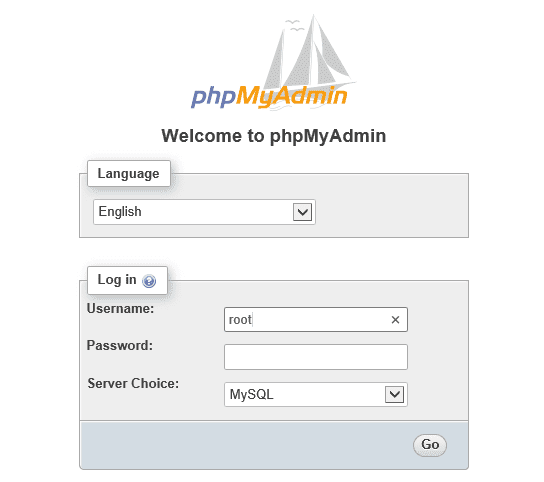
Log in with the default credentials: user root with the password left blank.
Once logged in, click the Databases tab.
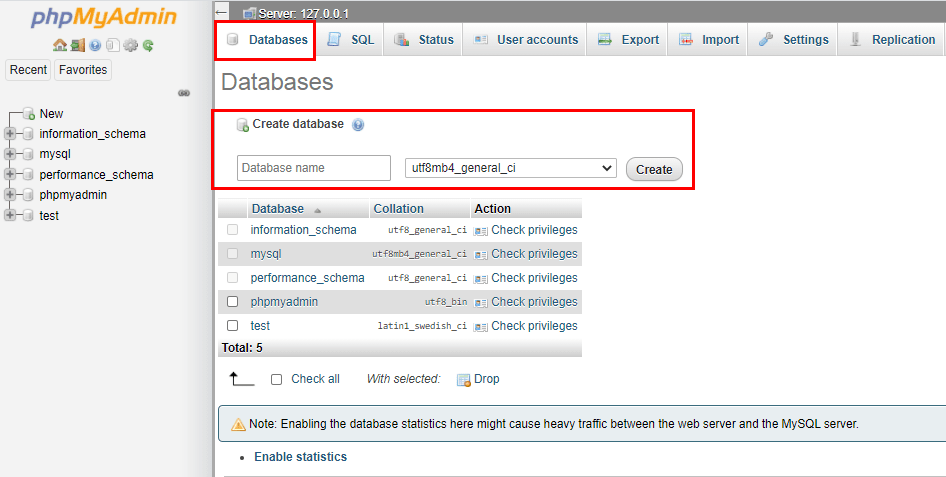
Create a new database. You can name it something like wordpress_local or match your project folder name.
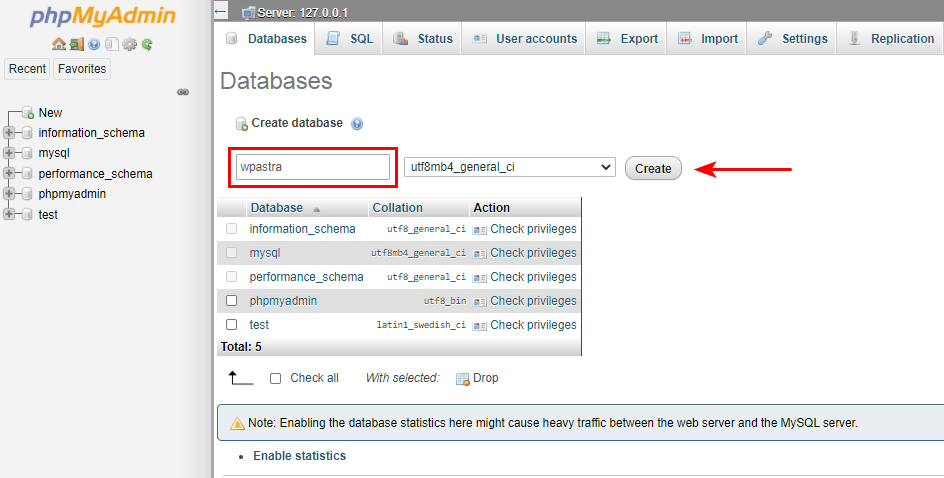
Keep the database name handy as you’ll need it on the WordPress installation screen.
Run the WordPress Install
Now the part where the pieces finally come together.
Install WordPress Through Your Browser
WordPress will show the installation setup page.
Choose your language and proceed.
Enter the database name you created, set the user to root, and leave the password blank.
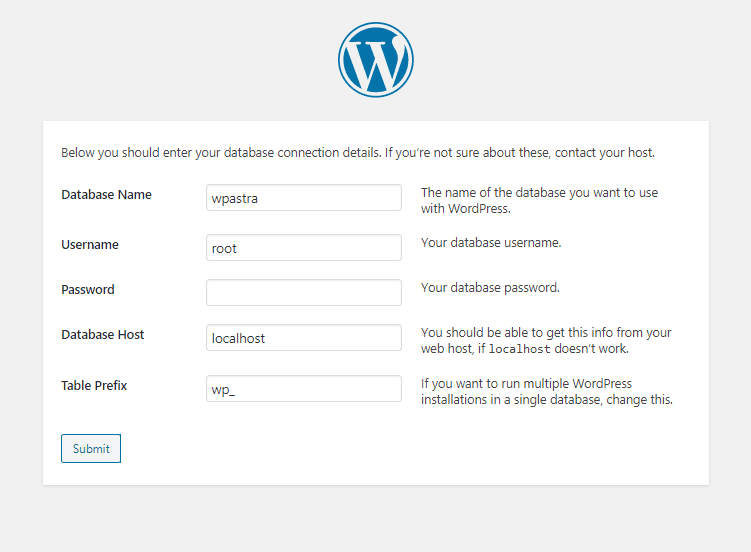
Run the installer.
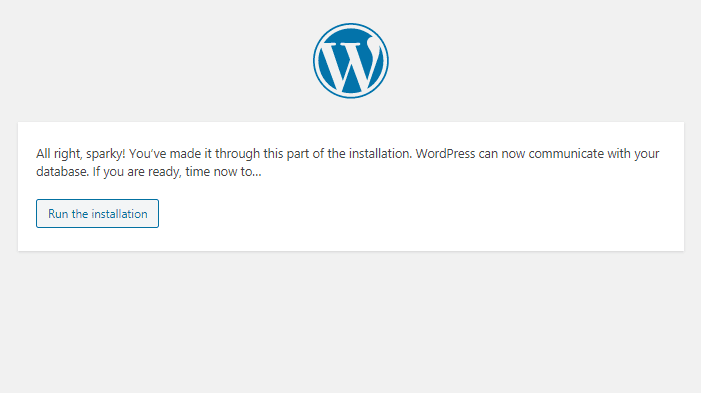
You’ll be prompted to choose a site title, admin username and password. Use something memorable.
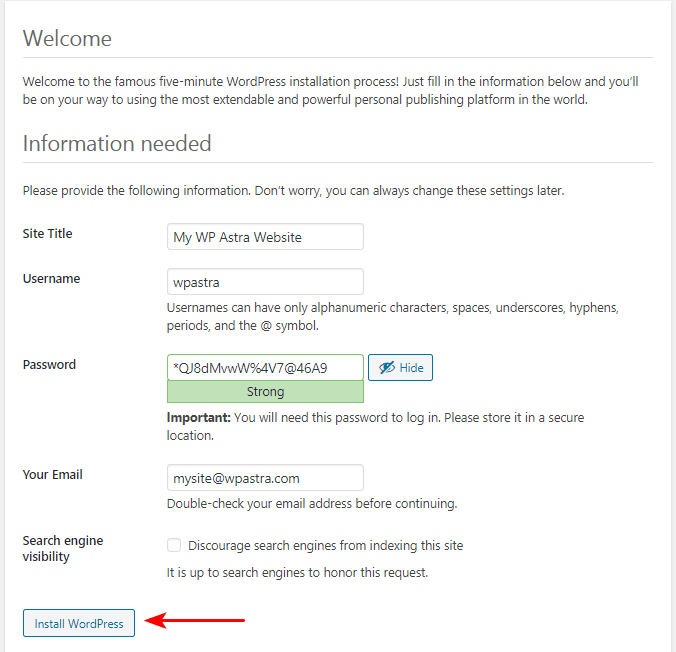
Once installation completes, you’ll arrive at the WordPress login screen. Use your new credentials to log in.
Bringing It All Together
This is when your local WordPress site becomes real.
You’ll see the familiar admin dashboard where you can install themes, add pages and start experimenting.
Common WampServer Problems and How To Fix Them
Nothing ever goes perfectly every time, especially with local environments.
Here are a few issues you’re likely to encounter.
- If localhost doesn’t load, check if WampServer services are running and that the WampServer icon is green.
- If phpMyAdmin refuses login, confirm you used root with a blank password.
- If WordPress shows a database connection error, double-check the database name and credentials you entered.
These issues are normal when configuring local servers and aren’t anything to worry about
Related articles:
What You Can Do Next
Once you’ve installed WordPress locally, there’s no limit to what you can explore.
You could:
- Install the Astra theme and Starter Templates and check out the designs.
- Try building a SureCart store offline before launching it.
- Test page builders like Elementor or Spectra without affecting live.
You’ve created a safe WordPress playground with WampServer. Use it to experiment and innovate as much as you like!
Publishing Your Local Site
A local install is great for development, but eventually you might want to make your WordPress site public.
You can do that by exporting it and migrating it to a host.
Tools like Duplicator or All-in-One WP Migration make it easy.
That’s a separate topic, but know that this local setup sets the foundation for full-scale deployment.
Install WordPress on WampServer – Quick Checklist
We tried to keep this local installation guide as simple as possible, but here’s a quick-review checklist that makes it even shorter:
WampServer
- Install WampServer (64-bit)
- Install Visual C++ packages if prompted
- WampServer icon is green
- http://localhost loads
WordPress files
- Download WordPress
- Extract and copy to C:\wamp64\www
- Rename folder (for example testsite)
Database
- Open phpMyAdmin
- Log in as root (no password)
- Create new database
Install
- Visit http://localhost/testsite
- Enter database details
- Run installer
- Log into WordPress dashboard
Done
- Dashboard loads
- Pages and media work
- Ready to build safely offline
Final Thoughts
Nice work. You’ve just taken a solid step into the world of WordPress development!
A local environment frees you from hosting costs, gives you space to experiment and speeds up your workflow.
Whether you’re a beginner learning basics or an experienced builder testing changes, this setup still makes sense.
WampServer is very good at what it does, but isn’t the easiest way to build websites.
The best way is to use an AI website builder like ZipWP.
It uses the power of AI to create a first draft website and hosts it for you.
Create a free account, set up a website and you can design, tweak and test as much as you like!
Do you use WampServer? Do you use an alternative? Have you tried ZipWP yet? Tell us about it below!
Install WordPress Locally FAQs
Installing WordPress locally on your computer is quite straightforward but you may still have questions.
How do I take my WordPress website online?
The easiest way to take your website online once created with WampServer is to use a migration plugin. It will usually involve creating a backup or duplicate of the site, uploading it to your web host, creating a database and linking the two together. While it may sound complicated, it really isn’t.
Can I install WordPress offline?
Yes, you can install WordPress offline using WampServer. This post outlines the steps you’ll need to take and discusses how to install WordPress locally step by step. You’ll need a copy of WampServer, a copy of WordPress and 20 minutes of your time. That’s it.
How can I update my locally‑installed WordPress, themes, and plugins?
You can update your locally installed WordPress, themes, and plugins in exactly the same way you do live. Log into WordPress, check updates and enable them all. WampServer redirects traffic via localhost but normal web traffic is unaffected so you should be able to update as normal.
What’s the difference between a local WordPress installation and a staging site?
The main difference between a local WordPress installation and a staging site is that local is on your computer and staging is on the web. If you install WordPress locally, you install it on your computer. If you use a staging site, you clone your existing live site on your web host and work on it there.

Pratik Chaskar holds the pivotal role of CTO at Brainstorm Force, serving as the backbone of the company. Renowned for his organizational skills, strategic thinking, problem-solving attitude, and expertise in leading and executing plans, Pratik plays a crucial role in the BSF’s technological landscape.
Disclosure: This blog may contain affiliate links. If you make a purchase through one of these links, we may receive a small commission. Read disclosure. Rest assured that we only recommend products that we have personally used and believe will add value to our readers. Thanks for your support!


Thank you for the article, but why make things so complicated by installing the not so appealing Wamp when another better faster option is available and is no brainer, I am talking about Local by Flywheel, which is the #1 WordPress Development tool, I personally used it and its installation is a snap and you have to enter the sites you want to work with the user and pass, it installs the latest version of WordPress on the go that’s it. Fire it up and you are ready to go as easy as 1-2-3. A good tool for beginners and wannabe bloggers to test out their gig before going live.
Hello Kurian,
Glad to hear your thoughts. Indeed, the mentioned tools are good alternatives too. 🙂
I personally went with local by Flywheel first but got issues which I failed to resolve. Wamp was a good alteranative which, thanks to this guide, I’ve been able to install successfully.
Hello,
Thank you so much for this awesome article.
You’ve really helped me!
Hi, I need your help please, I follow all the steps in your detailed article, but I’m getting “Error establishing a database connection.”
Any solution to this?
I have installed WAMP and created a WordPress site on my computer; thanks for this excellent guide.
Thank you!!!
Exactly what I needed to develop before making a website live.
Another super helpful and extraordinary article. Thank you for the detailed instructions; it saved my time.
Great guide, hosting wordpress website localy made my developement progress faster.
It is also great way for newbies to learn about wordpress.
Amazing article, any guide on how we can transfer local website to hosting server?
Nice tutorial.
All this time I though it is complicated and avoided. But, it was so easy and get done without any trouble.
Hello Ervin,
Glad to hear that! 🙂
Great, I was able to install everything with ease on my computer. Thanks to you.
Hello Francesco,
Glad to hear that the article helped! 🙂
I want to setup WordPress on local host, just have one question.
Does it allow us to use full functionality of WordPress?
Hello Eliza,
Yes, it would allow making all the changes! 🙂
Which is better WAMP or XAMPP? I’m new in this area, so which is easy to work with?
Hi folks
As a novice, while trying to absorb a lot of knowledge, I stumbled across your editorial in search of how to install Wordpress with Wampserver. My congratulations on a well designed process that anyone can follow!
No issues at all as I followed your guidance.
I am definitely going to delve a little more into your resources as I attempt to enter a world of freelance web hosting and development. There is so much to learn but I do believe that I will gain a good deal of knowledge from you.
Thanks once again for your assistance!
W. M.
Hello William,
Glad you found this article helpful! 🙂
The article is excellent. The screenshots and the steps are clearly given.
Great ! Thank you for your assistance.
Hi,
Help me please with the problem: I installed wamp and the latest wordpress in my laptop, created in localhost tour website, and the problem is that when I click on “Tours” on the main menu tab and then on the separate tour it shows this message (Not Found
The requested URL was not found on this server.
Apache/2.4.54 (Win64) PHP/8.0.26 mod_fcgid/2.3.10-dev Server at localhost Port 80)
So, when clicking on the separate tour from the dashboard it goes to the separate tour with a right permalink.
how can I fix it?
by the way when showing error message it doesn’t show the word “wordpress” on the link, but from the dashboard clicking it shows.
Super Easy Explanation! Thanks
Glad you found it useful!
Any solution for the below error, plz???
{
“Cannot select database”
The database server could be connected to (which means your username and password is okay) but the test
database could not be selected.
Are you sure it exists?
*)Does the user root have permission to use the test database?
*)On some systems the name of your database is prefixed with your username, so it would be like
*)username_test. Could that be the problem?
}
As per the error shared, it seems your database credentials do not match. You would require to review them if they are same as you are entering to connect the site.
I got this issue and it was solved by going to PHPMyAdmin and creating the DB according to this guide